Throughout the entire time I have been interested in bikes, utility had usually been a pretty high priority when it came to how I chose my bikes. However, there have been times when I allowed myself to disregard that and to build something "just because." Those bikes don't usually stay the way they are or stick around for long, but this one is an exception. 
This bike was previously owned by someone in one of the vintage bike communities on Facebook. I had befriended a group member named Randy after I had replied to his questions about removing the surface rust from the chromed parts and servicing the Sturmey-Archer 3-speed hub. After tinkering on this bike for a while, his interests shifted to other muscle bikes and put this one up for sale. At the time, I had been nursing an increasing interest in muscle bikes myself, after seeing what other folks had been working on. I fancied the idea of being able to roll down the block on a unique bike when grabbing a bite to eat. So, I told him that I wanted it, and picked it up in Ohio in the middle of my move from Ann Arbor to Pittsburgh in July 2017.

The bike came with a Sturmey-Archer AW 3-speed hub and front and rear hand brakes, which I found interesting given that many muscle bikes in the day came with coaster brakes. It also came with 20x1-3/8" (451mm bsd) tires, which are very uncommon in the US. Randy hand managed to find some new tires for it, but I immediately planned to give it some standard 20x1.75" (406mm) wheels and a coaster brake. Part of the appeal of this bike, to me, was that it seemed compact and easy to maneuver, and the very long brake cables took away from that. Besides, the original wheels were in terrible condition and missing a spoke. I liked the colorful, wound brake cable covers, and found the longest continuous non-cracked piece to put on the shifter cable.

Progress on the bike was very gradual. The whole thing was actually in very poor condition; besides, I was in school and had very little time to dedicate toward non-utilitarian projects. I would work on this bike bit by bit, on days when I had sudden bouts of motivation to do so. One of the first things I did was paint this 1988 Sturmey-Archer AWC hub, which came to me originally on
this bike, with Duplicolor Metalcast.
The original front fork spacing, in keeping with Raleigh tradition, was 90mm. After accidentally ruining the fork on my
Raleigh Twenty trying to change the spacing, I decided it wasn't worth risking another 20" fork, especially one in this rare color. This red Joytech BMX hub was one of the only 90mm 36-hole hubs I could find at the time, and even though colored hubs were not part of the original plan, I really liked the idea. Therefore, I painted the rear one to match. I am very happy with the anodized look that Duplicolor Metalcast provides.
I laced the hubs into vintage Weinmann ZAC30 BMX rims with my usual DT Swiss Champion stainless spokes. I am realizing now that I forgot to use brass washers with the rear hub. Tires are 20x1.95" high pressure BMX skinwalls from FitBikeCo. They just barely fit within the chain stays.
A fun fact is that the Rodeo was Raleigh's response to Schwinn's success with the Stingray. It didn't really catch on, and since these bikes were primarily made for the American market, they released another model called the Fireball which was supposedly identical except for the standard 406mm wheels. Because of this, I've effectively turned this bike into a Fireball. What I am wondering and do not know for sure is whether the chain stays on the Fireball are further apart. I've never seen one, and everyone I've talked to who has one of these models doesn't have the other to compare it to.
The original "Rodeo" chain guard decal was basically gone and I couldn't find a replacement, so I bought one of these early '60s era ones since it had a similar character. The original cranks on the bike were 140mm long and very badly bent from having been in too many crashes. I took the less-bent, 48-tooth, 165mm crankset that I had left over from
these bikes and put them on the bike after overhauling the bottom bracket. An added bonus is that the cutouts in the chainring sort of line up with the bottom front edge of the chain guard, which looks nice. I also thought that the original pedals from
this bike, which coincidentally was also from the same era, would be good replacements for the original pedals which were basically dead. I'm glad I was able to reuse so many old parts on this build.
The shifter knob and the face plate were missing from this bike when Randy got it, and he had thankfully found a new face plate for it. I couldn't manage to find a screw that had the right threading, but cannibalized one from another Sportshift of a different design that I had ended up with when I bought a Sturmey-Archer parts lot. That shifter still doesn't have the right screw, but it's in pretty bad shape overall.
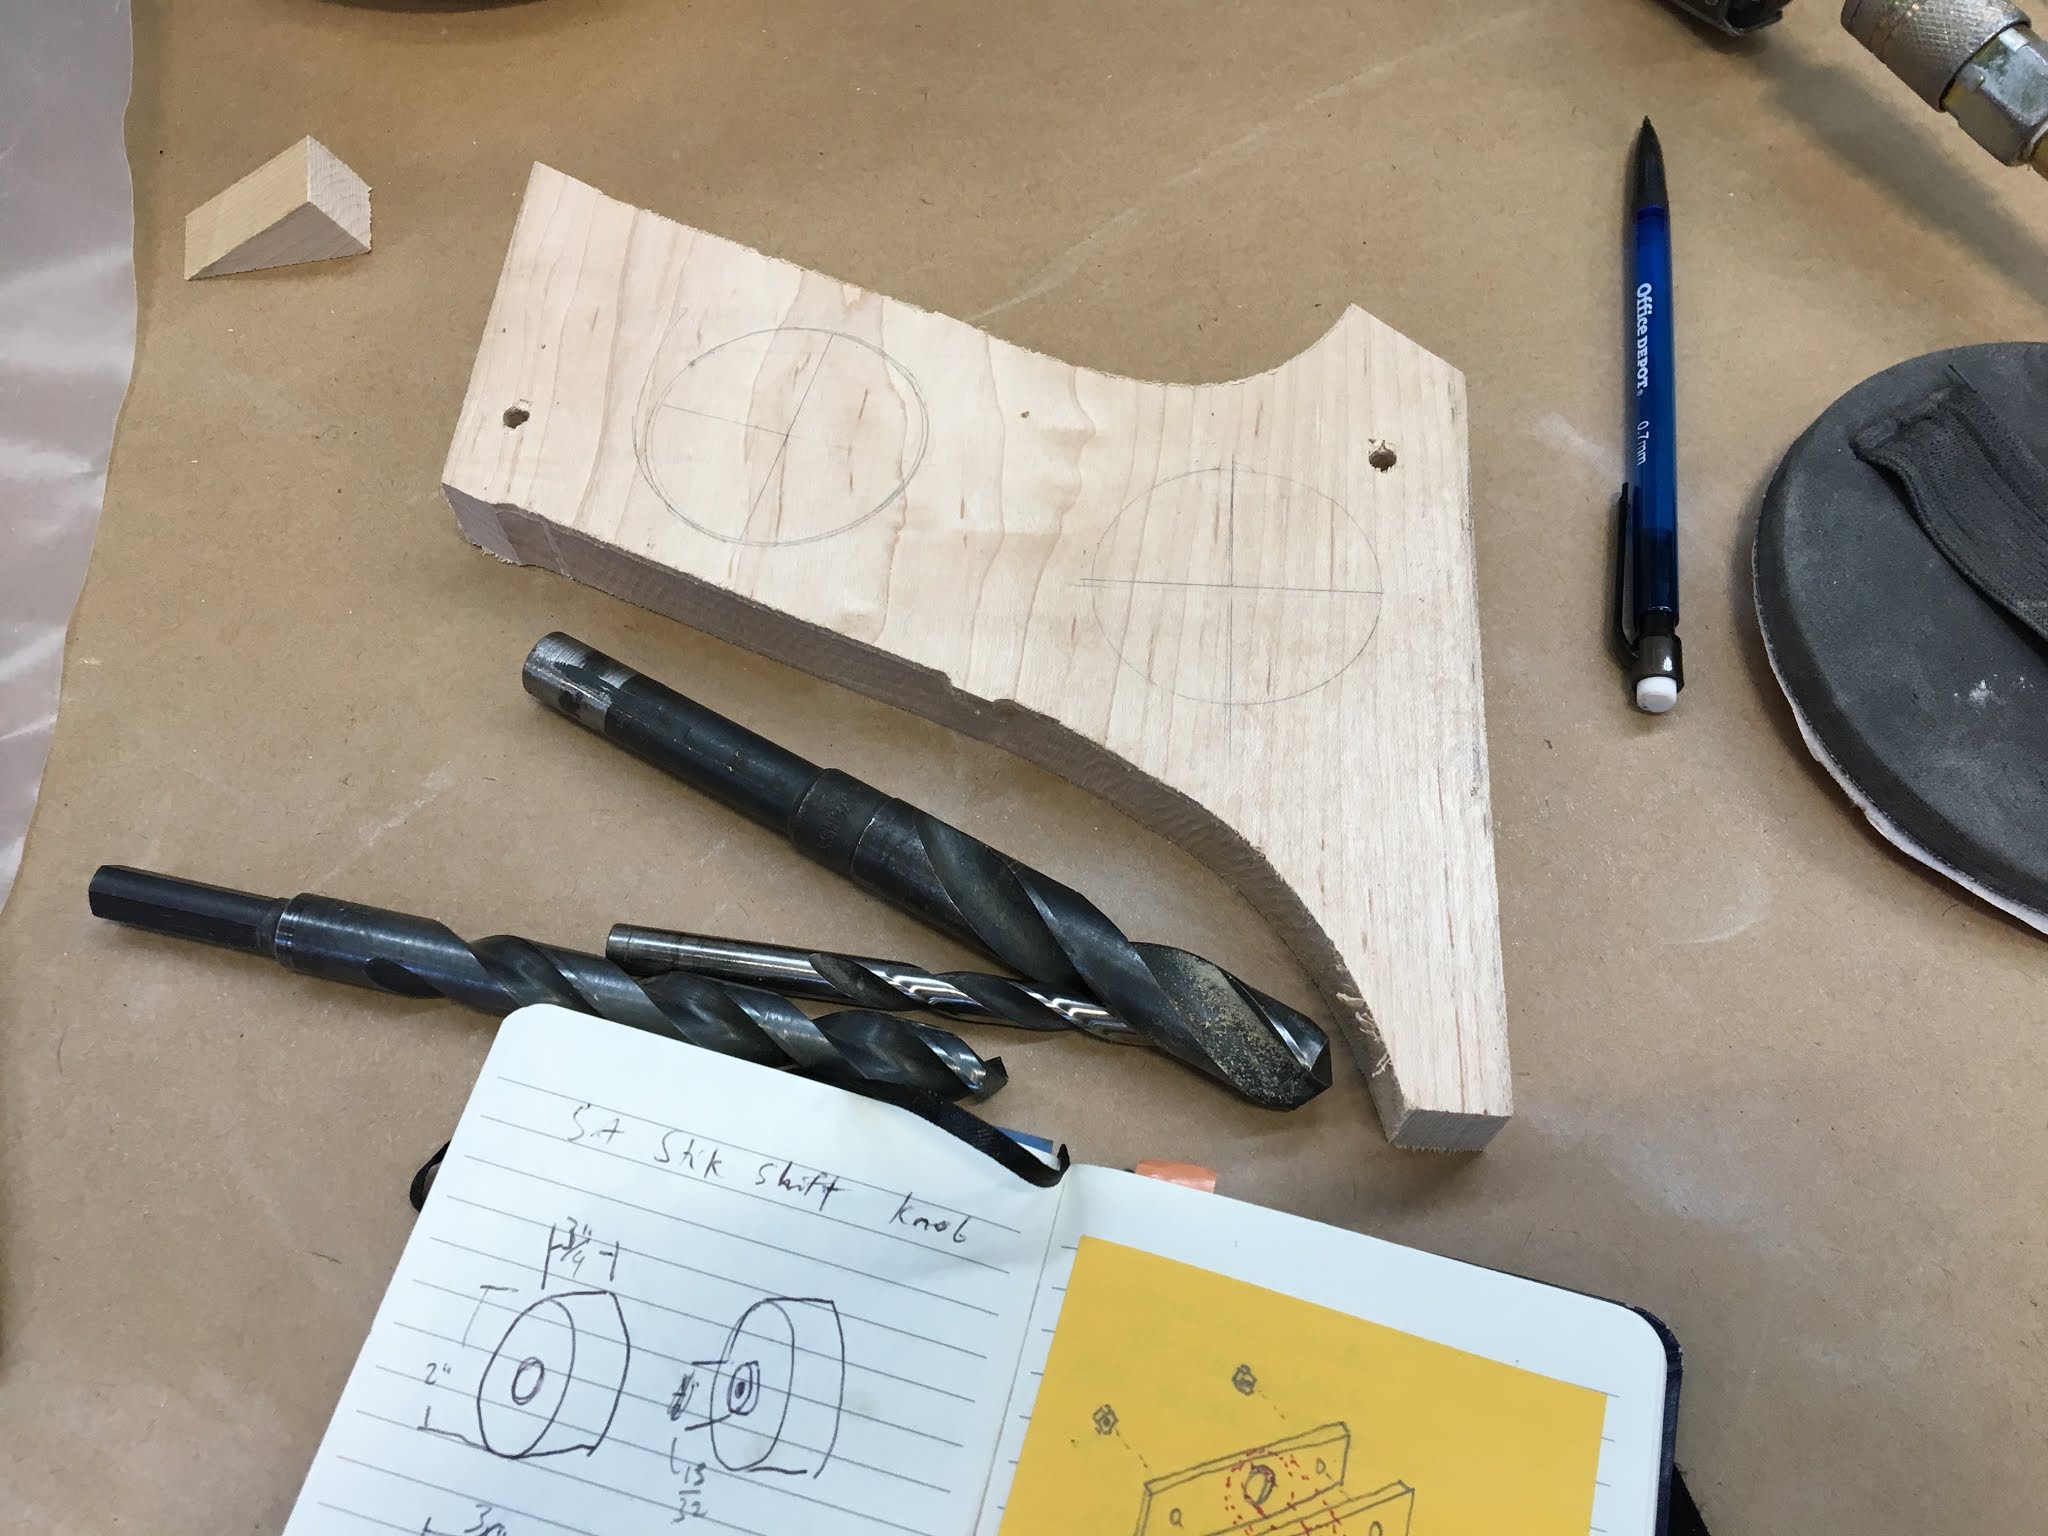
I drafted up an idea on how to make a shift knob for it. I worked in Carnegie Mellon's architecture wood shop in the summer of 2017 before grad school started and learned a lot of techniques from the head of the shop, Jon Holmes. I had intended to use the metal lathe on a stack of MDO laminated together, which we had lots of at the time. I thought the orange/tan striped appearance would go well with the wound shifter cable cover. That never happened since I got busy once classes started.
Two years later in July of 2019, after I had technically graduated, I ended up using 3/4" maple plank that was left over from the pièce de résistance of my time with the Urban Design Build Studio. Instead of using a lathe, I cut the sides out with a band saw the best I could, used the drill press to create the recessed holes, chucked it all onto a handheld drill, and used sandpaper to round out the pieces.
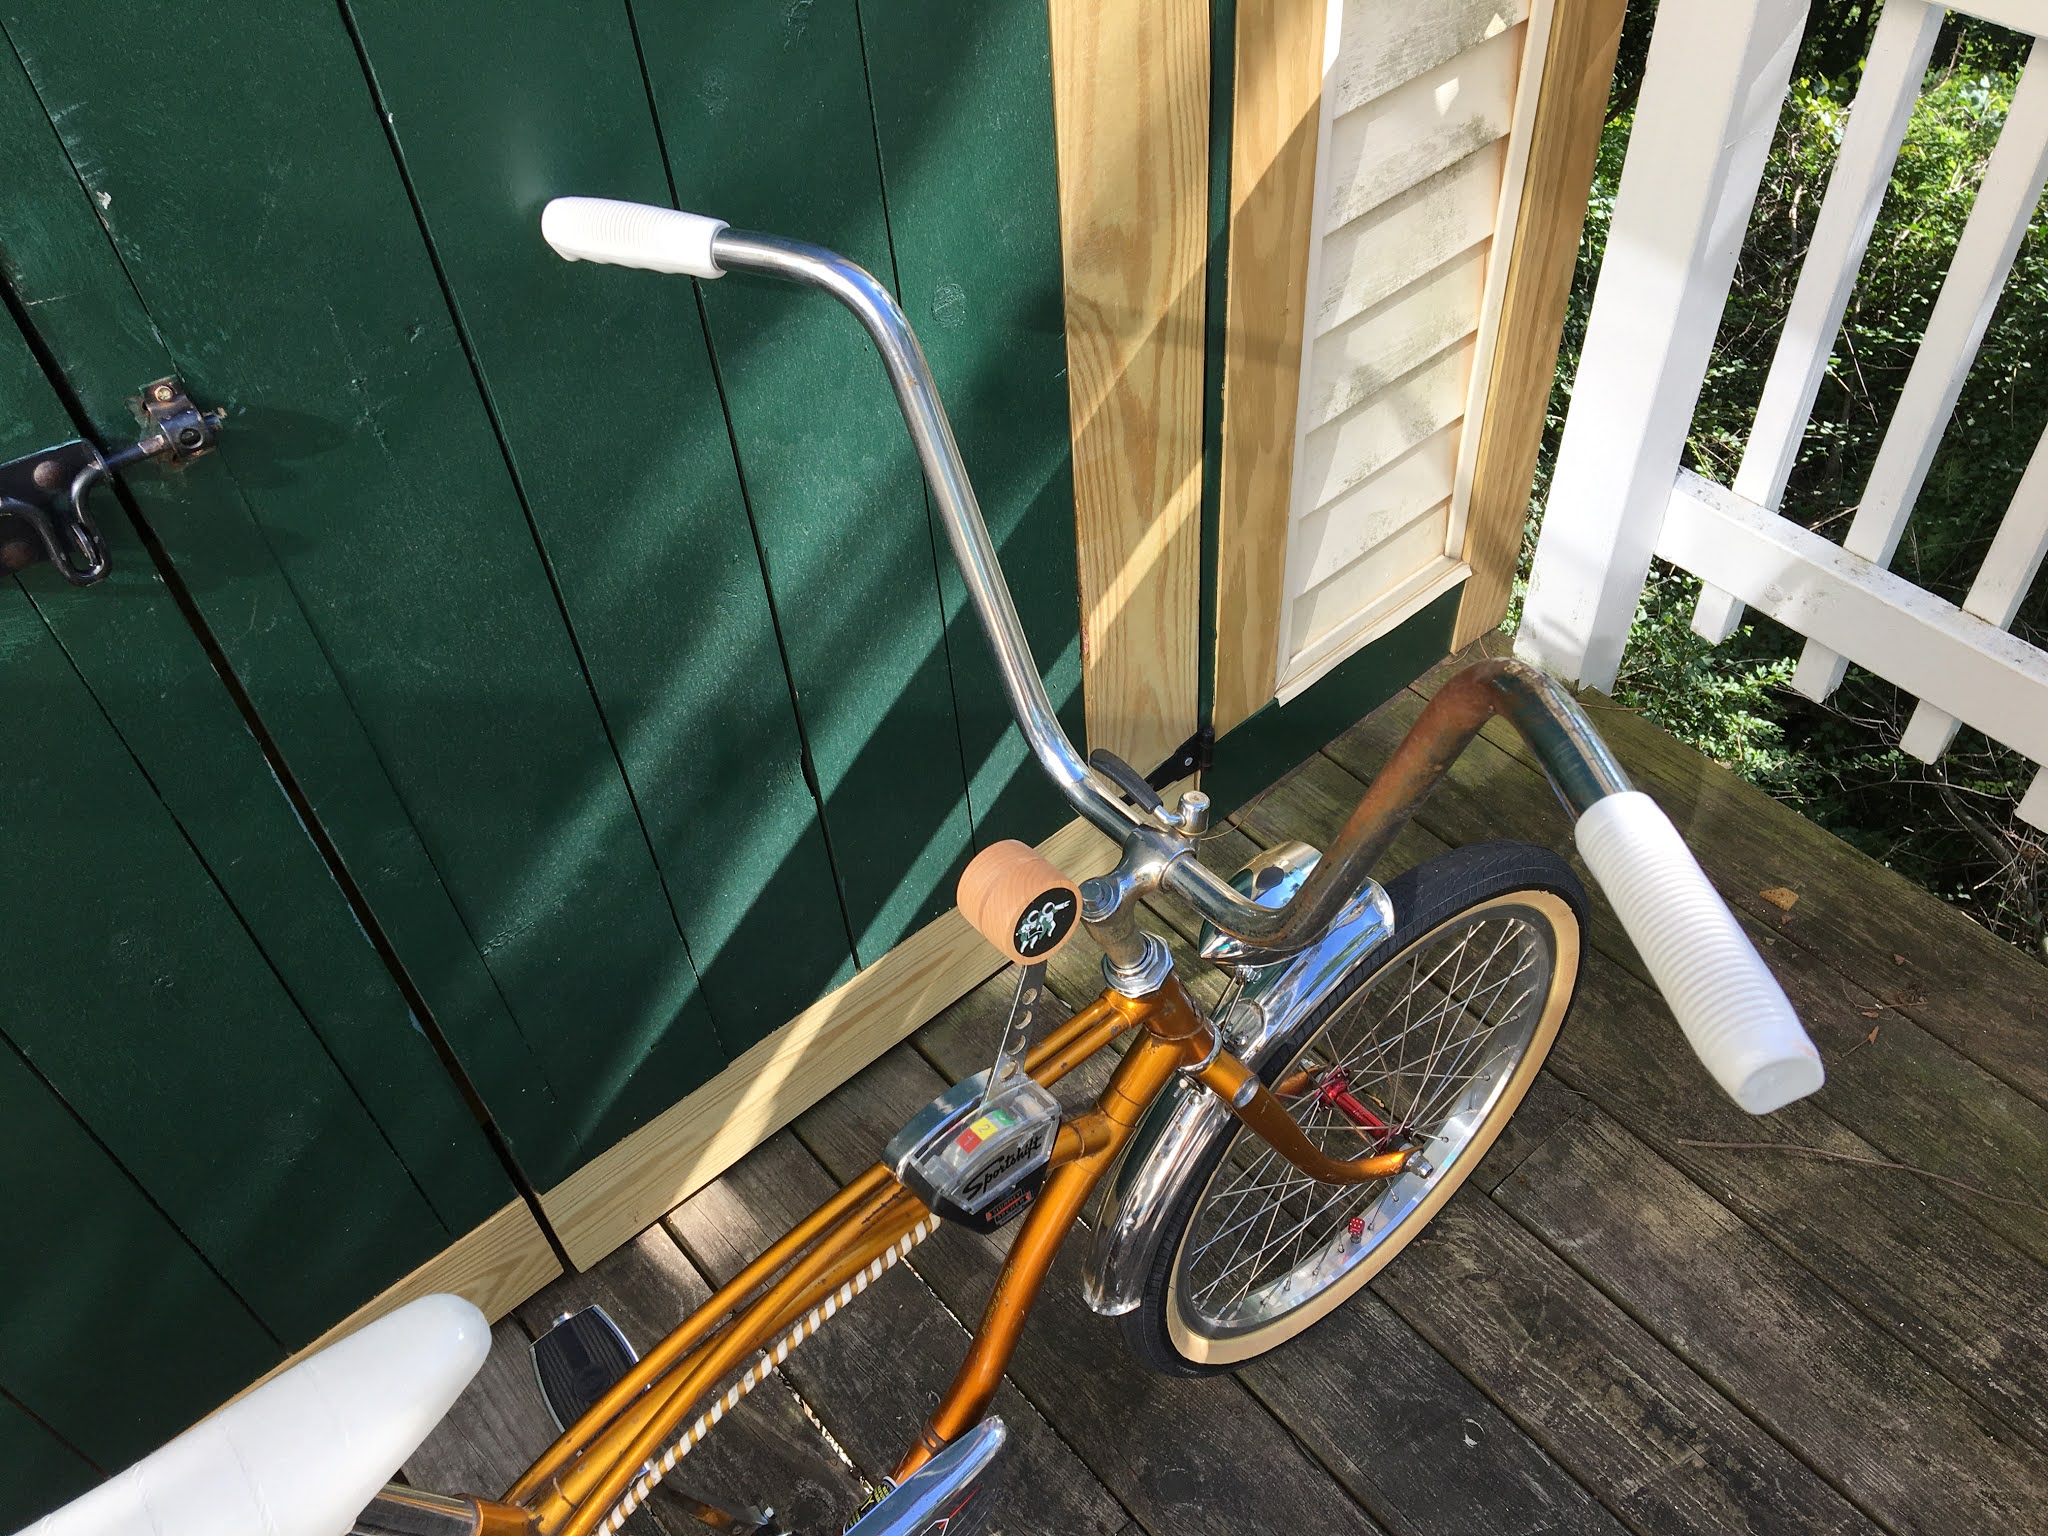
I gave the wood pieces a satin polyurethane coating after they were finished. Not shown here is a rubber washer that I used to take up the space between the two halves, since the hole in the shift lever was far bigger than the bolt I used. Even though they were recessed, the nut and bolt were still pretty ugly so I covered the holes with stickers. I thought these astronaut stickers were appropriate since the bike is from the space age.

This right here is where the name "Banana Hammock" came from. Sadly, I had to throw out the Brooks-branded banana seat and sissy bar since they were not only heavily damaged, but quite disgusting. I replaced it with this generic one with foam that is too soft and too thin, so it feels like I'm basically sitting on the metal plate and it hurts after a few minutes. Not a huge problem. I added this fruit hammock under it, anticipating that I could use it to hold a wrap and a canned drink from Frenchi's Deli down the block. Have to retain some practicality, right? By the way, I went there so regularly that Frenchi offered me a job. I've been working there on weekends for about a year now. Anyway, I think I only rode this bike to get food there once. After I had gotten it into a rideable state, I became so busy that I would be at the architecture studio every night, well past their closing time.

Like most other pieces, I bought this headlight very early in the build process, but it kicked around in the bin for nearly two years since overhauling the headset was one of the last things I did. Speaking of which, this bike had evidently been jumped so much that the lower headset cup was no longer a tight fit in the head tube. It isn't a huge problem seeing that I'll never be riding this bike in extensively and in a hardcore manner, but in hindsight, I could have used some JB Weld to take up the extra space. Anyway, the headlight was one of the more expensive bullet-style models that are available today. It has a built-in reflector and a nice yellow glow, despite it being an LED. It is adequately bright for street riding at night and I was very close to putting it on other bikes when this one was still unfinished.

I kept the original handlebars and stem, but replaced the grips. I wanted the bars and stem to be easily turned and for when I wanted to take it somewhere (even though I already have a folding bike). I even cut the bottom of the stem down so that I could use a rear axle quick release in conjunction with the quill expander, but that fell through. I ended up tightening the stem just enough to where it would stay in position while being ridden, but could be turned if twisted hard. I don't know why I tried so hard to get this right since I always have an adjustable wrench on me and wherever I go. Anyway, the seat post quick release did work well for the handlebar clamp, though. It gets about as tight as the original bolt did.

Turning the bars works well for storing the bike, since it fits perfectly on my bedroom windowsill, between the window and the blinds. I can close the blinds until they sit just above the protruding rear axle nut, which allows my cat a nice amount of space to climb into the empty window and look outside. The blinds can be closed fully if I pull them forward a tiny bit to clear the rear axle nut. Ironically, the one thing I still have to do when I take it out is to put on the pedals, which is more of a hassle than any of the stem stuff, and requires a pedal wrench (the wrench flats are very narrow) which I may NOT have at all times.
Either way, I'm really happy with the way this bike turned out and I don't see any reason to change it soon. It's nice to have around; it doesn't take up much space and it turns heads whenever I take it out.


I don't know what made me look up. Nigh old bicycle, I had when I was 8 years old. Bordom lol
ReplyDeleteMy grandfather bought me this bike from a bike shop in Dormont Pa. ( I lived in Mt.lebanon) yes, the original shift knob was made of wood. Same color as yours. A very expensive bike. More than a Schwinn. I loved it. It died a tragic death, my friends mother rolled over it in the driveway.
Haha, love the story! and sorry to hear about your bike. What a small world ... I bought this bike as I was amidst a move to Pittsburgh. Still live here.
Delete