
Showing posts with label Restoration. Show all posts
Showing posts with label Restoration. Show all posts
Saturday, November 21, 2020

Thursday, November 19, 2020

Sunday, April 26, 2020

Tuesday, November 26, 2019
1974 Peugeot UO-8 Delivery bike
This bike came to be the way it is for many reasons, and all of the planning or brainstorming in the world couldn't have made it work out as well as it did when everything finally came together.

1970s Sears Sportflite Tandem Restomod
Here's another one of those things that I thought I'd never have the reason to build: A tandem!

Friday, June 9, 2017

Wednesday, January 4, 2017
Raleigh Cottered Crank/Bottom Bracket Service
When I got my first bike that had cottered cranks, a 1958 Raleigh Sports, I didn't know anything and thought "Oh, how convenient! I can probably just undo the nut, use some WD-40, and slide it out! And nope ...
Note: Sheldon Brown and John Allen have already written an excellent article on dealing with cotter pins and they do a better job explaining, so look at that first. As with the article on SW hub service, this one is meant to be a one-stop guide that hopefully supplies enough information to bring someone from start to finish on a compete rebuild of the bottom bracket, covering more than just pin removal.

Note: Sheldon Brown and John Allen have already written an excellent article on dealing with cotter pins and they do a better job explaining, so look at that first. As with the article on SW hub service, this one is meant to be a one-stop guide that hopefully supplies enough information to bring someone from start to finish on a compete rebuild of the bottom bracket, covering more than just pin removal.

Tuesday, January 3, 2017
Rod Brake Service
Rod brakes are an ancient, finicky system. Tuned well, they can provide decades of maintenance-free service in dry weather. However, there are many ways by which their operation can be compromised and the seemingly innocent adjustment of handlebars, stem, and chain tension are a few things that demand extra attention with rod brake roadsters. Also, if you are like me and happen to live in an area without a significant following for vintage or utility cycling, it is likely that no shops in your vicinity will service rod brakes. Rod brake roadsters may seem intimidating to work on at first but I will attempt to dispel any self-doubt that may exist due to the smattering of poorly-given advice on the internet. If you have patience, some basic tools, and can turn a wrench, you can give your own rod brakes a full service.

This post will cover several different things you can do with rod brakes to make them perform better than new. The order in which these tasks are completed will vary with the condition of the mechanism. If your brakes need a full overhaul, don't hesitate to tear them apart and do all the steps at the same time. With rod brake roadsters, basic maintenance, even a simple wheel removal can take much longer than expected. Take this as motivation to get everything dialed in correctly the first time. First, let's go over the names of some parts just to clarify what I will be talking about:
Wednesday, October 12, 2016
The Oldest To Date: 1948 Raleigh Sports Restoration
So I walked into the Re-Use center, picked up a beautiful blue 1975 Raleigh Sports, and bought it ...


Sunday, July 10, 2016
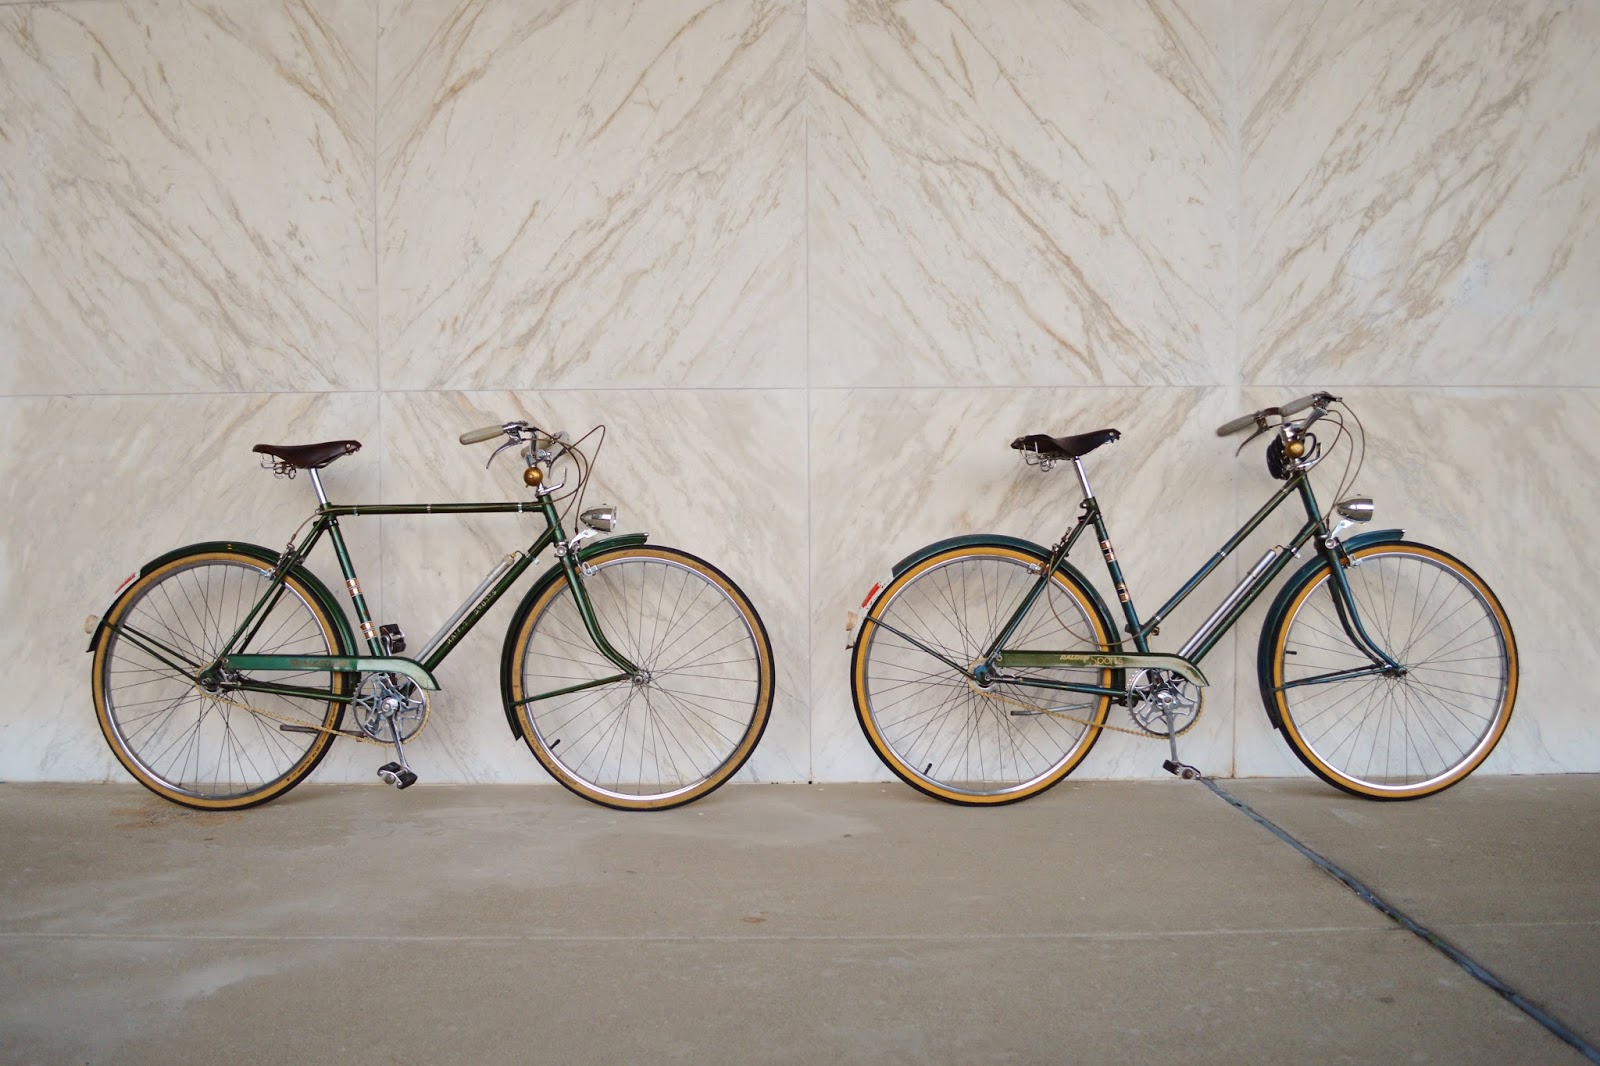
Linda and Gary - 1966 Raleigh Sports
After months of running out of time, some foot-dragging, and dirty hands, this lovely Mr. Mrs. pair finally emerges from their spa day.

Wednesday, April 27, 2016
Overhauling a Sturmey-Archer SW 3-speed Hub
In my experience, bits of information on the Sturmey-Archer SW hub are few and far between. While Brian Hayes provides a wealth of valuable information on Sheldon Brown's website as does Tony Hadland, I still had to dive into this operation unsure of what to expect the first time. That being said, if you plan to work on this hub and/or put many miles on it, I suggest that you thoroughly read Hayes' article before doing anything else. This post is the first of a few "tutorials" I plan to write and with it, I hope to bring together all of the information I have found useful and provide straightforward, basic instructions to tear down one of these hubs and get it running without modification.


Image from en.wikimedia.org
Thursday, June 4, 2015
Rejoice! Gwendolyn's Sturmey-Archer SW Hub Gets Rebuilt (Plus Some Other Stuff)
Before I go into detail on the good news, there are a few updates I have done to make my trusty 1958 Raleigh Sports even more practical.


First, I bought a Greenfield rear kickstand. The original kickstand, however strong, did not extend far enough from the bike and was located too far forward to provide support with weight on the rack. Actually, it was barely adequate to hold the bike up empty. I never intended to use a kickstand while the crate was full of groceries, but it is doable with this one. 5/5, would recommend. Also, I fit a piece of cardboard into the bottom of my new (used) crate but not for reasons you may think. I am not foolish enough to loosely carry things in there that are small enough to fall through the holes, but when the crate is in my room, I always throw the rest of my bungee cords into it for storage and the cardboard makes them easy to take back out, rather than allowing them to hook onto the bottom of the crate and demand disentanglement.


First, I bought a Greenfield rear kickstand. The original kickstand, however strong, did not extend far enough from the bike and was located too far forward to provide support with weight on the rack. Actually, it was barely adequate to hold the bike up empty. I never intended to use a kickstand while the crate was full of groceries, but it is doable with this one. 5/5, would recommend. Also, I fit a piece of cardboard into the bottom of my new (used) crate but not for reasons you may think. I am not foolish enough to loosely carry things in there that are small enough to fall through the holes, but when the crate is in my room, I always throw the rest of my bungee cords into it for storage and the cardboard makes them easy to take back out, rather than allowing them to hook onto the bottom of the crate and demand disentanglement.

Friday, February 27, 2015
1976 Schwinn Varsity: Restoration Complete
Prior to today, I'd been slowly working at the Schwinn when I wasn't doing school work or wrenching on my other bikes. My friend who commissioned me to do this doesn't ride in the winter so he said there was no rush at all.

One of my friends who has access to the machine shop helped me grind the old kickstand thing off. The kickstand was long gone and the sleeve it went into was badly rusted. These brazed-on Schwinn kickstands were really tough, but I suppose that doesn't make a difference when they're not actually on the bike ...
One of my friends who has access to the machine shop helped me grind the old kickstand thing off. The kickstand was long gone and the sleeve it went into was badly rusted. These brazed-on Schwinn kickstands were really tough, but I suppose that doesn't make a difference when they're not actually on the bike ...

Sunday, February 1, 2015
Varsity Restoration Continues
It's kind of hard to keep track of how long I've been working on my friend's Schwinn because it's been so on-and-off between school work and the other bikes. Because of this, I'm going to stop counting it in days. I guess this is the third significant chunk of time, say about three hours, that I've sat down (stood up, rather) to get a visible amount of work done.


Friday, December 19, 2014
Tearing It All Apart: Varsity Restoration Day 1
With final exams coming to an end on Wednesday night, I was finally able to start working on my friend's '76 Schwinn Varsity yesterday. I did not hesitate one second to blow the entire thing apart.

Photo from when I first got it

Monday, September 22, 2014
Revival, Restoration, and Rebirth: A Reflection
A recent post from Velouria, the author of a blog that I follow called Lovely Bicycle!, finally put to words something that had been nagging at the back of my mind for a while. This past summer, when I was in the process of restoring my 1958 Raleigh Sports, a strange feeling came over me that still hasn't completely left since then. To sum it up, my faithful, dependable 3-speed no longer quite felt like the good ol' bike that I knew and loved. Not that I regret restoring the bike at all, but this experience, as well as Velouria's post, combined to teach me a little something about how simply setting out to erase the battle scars and rust from an old machine may get you a little more than you bargained for.

Memories of this bike before I had the chance to rescue it seem so distant, even though the earliest one is only about two years old. The story really only started ten months ago and even then, it feels like ages since this bike was finally freed from its decades-old parking spot because so much has happened since then.
Memories of this bike before I had the chance to rescue it seem so distant, even though the earliest one is only about two years old. The story really only started ten months ago and even then, it feels like ages since this bike was finally freed from its decades-old parking spot because so much has happened since then.

Friday, August 1, 2014
1958 Raleigh Sports: It's Done! Restoration Days 14 and 15
Not much happened on Day 14, actually. I spent most of the day working with Dad to repair the sprinkler's main supply pipe, cutting PVC and cementing it together. I used the remaining time to give the handlebars and brake calipers the WD-40 penny treatment and removed most of the rust.

The first thing I did yesterday, day 15, was pack the fork bearings. I slathered grease on all four bearing surfaces and smushed them together to install the fork.
The first thing I did yesterday, day 15, was pack the fork bearings. I slathered grease on all four bearing surfaces and smushed them together to install the fork.

Thursday, July 31, 2014
Paint: Restoration Days 11, 12, and 13
Boy, that came quickly. In one moment I'm stripping paint and smoothing out rust spots which seemed like it would take forever and then all of a sudden, the paint is all done. I guess it seemed this way because I was putting primer on some parts while still sanding others. The only things left to do is to shine up the handlebar and headlight and then we'll see if I can get the whole bike back together again.

Outdoor spray booth version 2.0: I unhooked the swings from our old swing set and took advantage of the existing hooks. Thank goodness we still have this, even though it's a hassle to mow around and I haven't played on it for years.

Sunday, July 27, 2014
Sanding, Priming, and Sanding: Restoration Days 8, 9, and 10

The often-used outdoor spray booth, aka the backyard.
I stuck a chopstick through the brake bolt hole and hung the fork on a dead branch that I'll get rid of once this project is over. I couldn't find any disposable string in the house for some reason. Of course, I had to move to the cardboard afterward to get paint into the brake bolt hole.

Saturday, July 19, 2014
Paint and Rust Removal: Restoration Days 6 and 7
After taking care of a bunch of yard work earlier this week, the trash cans were full and I was finally able to get back to the Raleigh Sports on Thursday and Friday.

I started with the smallest and rustiest body component: the chain guard. This thing was nearly covered in surface rust and where it wasn't, the paint was all peeling off due to all the little pits of rust forming. I spent all of Thursday just sanding the outside smooth, trying to free it of pits. Thankfully, the sheet metal was still very solid and wasn't even close to rusting through.
Chain guard on Thursday. The inside had not yet been dealt with yet.
I started with the smallest and rustiest body component: the chain guard. This thing was nearly covered in surface rust and where it wasn't, the paint was all peeling off due to all the little pits of rust forming. I spent all of Thursday just sanding the outside smooth, trying to free it of pits. Thankfully, the sheet metal was still very solid and wasn't even close to rusting through.

Subscribe to:
Posts (Atom)